ARCH ESSENTIALS: User Guide
Sweep Profile
Use for
- Window and door trim or moulding;
- Fascia, rafters, soffits, drip edges and some types of guttering;
- Baseboards (skirting boards) and other mouldings around the inside of a room;
- Door liners and door stops;
- Window and picture frames;
- Shiplap cladding;
- Curved walls;
- Architectural window shades;
- Plus much, much more...
Overview
An enhanced version of the original Sweep Polygon tool that enables groups of profiles - ngon islands and open-loop beziers - to be sweep simuklansouly along a path defined by selected points.
This new sweep tool (a custom tool written in C++) has many advantages over the original,
- Sweep multiple profiles simultaneously whilst maintaining their relative positions to one another.
- Support for open-bezier profiles with subdivision control.
- Polygon-part names taken from the original profile and applied to the swept geometry.
- Materials are taken from the profiles and applied to the swept geometry.
- Peel UVs option, which is great for sweeping along curved paths.
- Scale UVs by distance, which is useful for matching texture coverage to distance in 3d view.
Workflow
To use this tool,
- Select a single mesh item layer with two or more points selected (the sweep path); or
- Select two mesh items. One item with one or more points selected (the sweep path) and the other containing your profile/s.
- Left-click the Sweep button in the Arch-E UI, Labs kit section.
- Left-click in the 3D viewport.
- Select options as required.
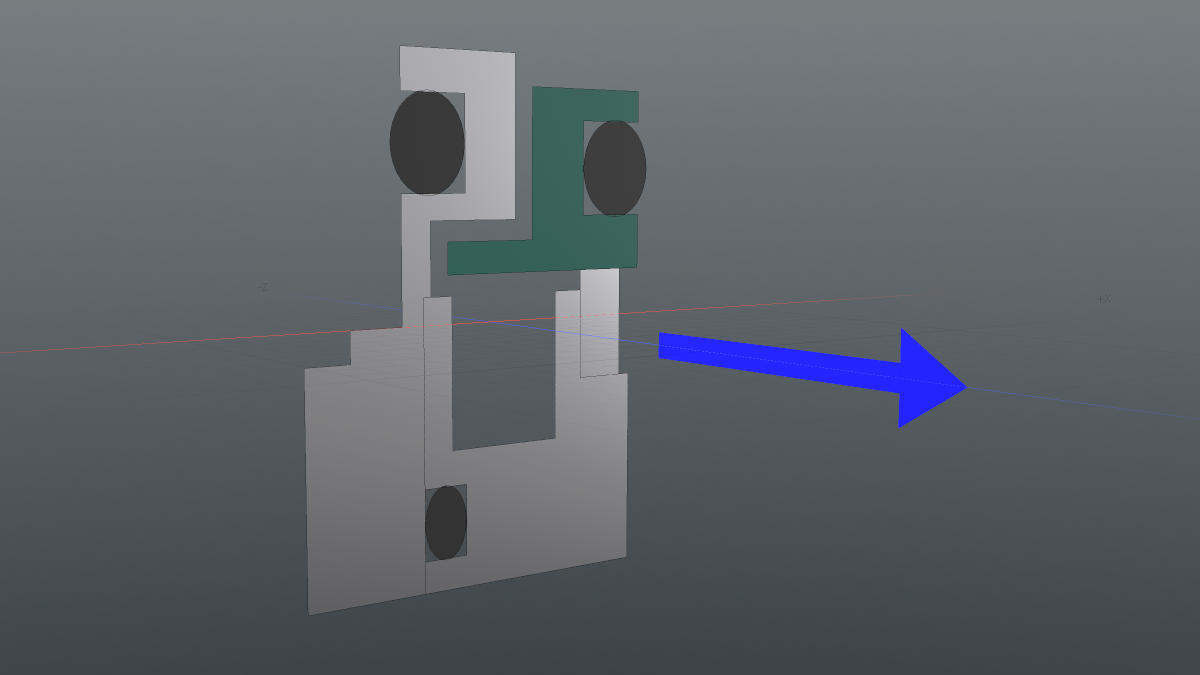
Using Custom Profiles
Custom profile/s must be,
- Aligned to the XY plane (at Z=0), with their normals facing the Z+ axis;
- One or more single-polygons (Ngons) and/or open-loop bezier curves.
You can use the Prep Profile command to quickly centre and flatten your profiles and the Profile Rebuild Tool to clean-up and set the UV seam positions of your profiles, prior to sweeping.
The maximum number of profiles that can be swept simultaneously is 25. This arbitrary limit will likely be increased in future.
Modo Scene File
The 'bearing profiles' scene is included with the kit. You'll find it in the 'nx_scenes' folder.
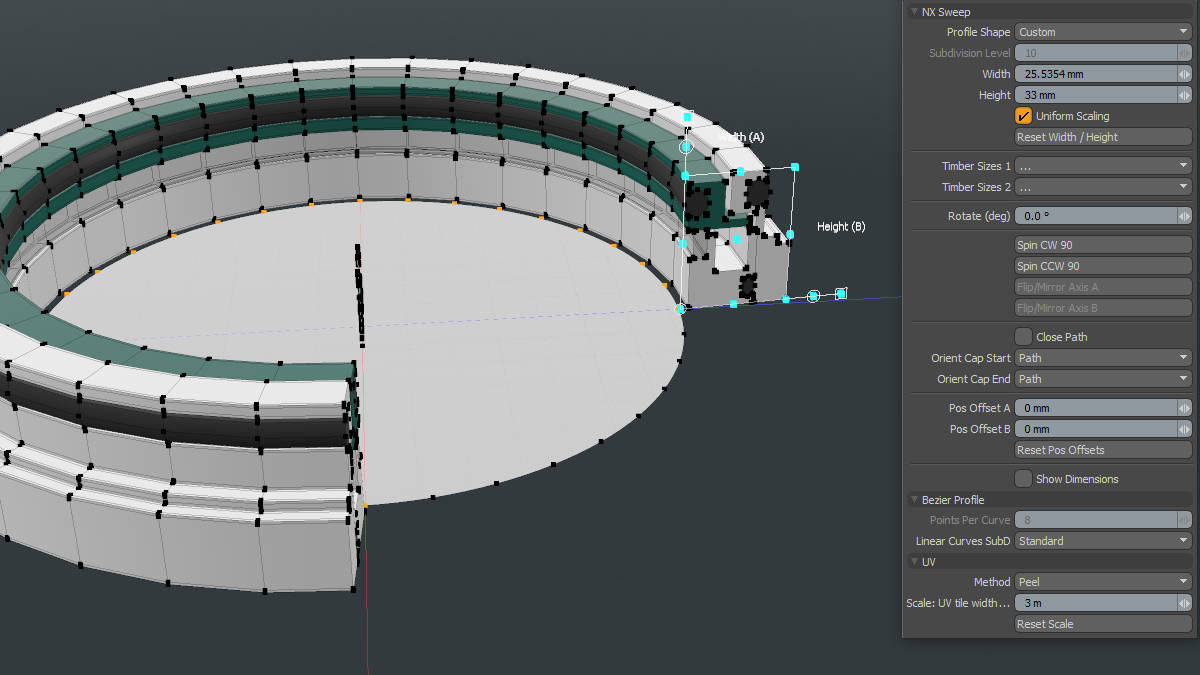
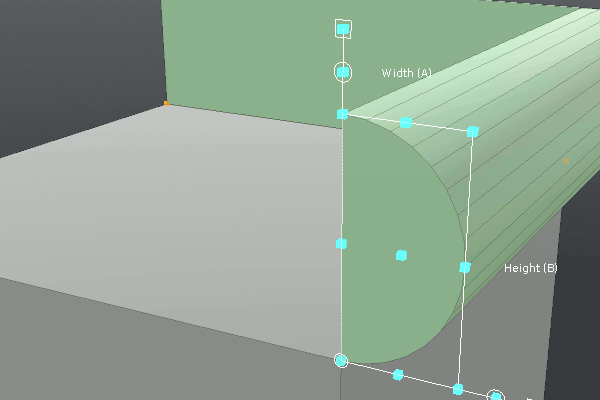
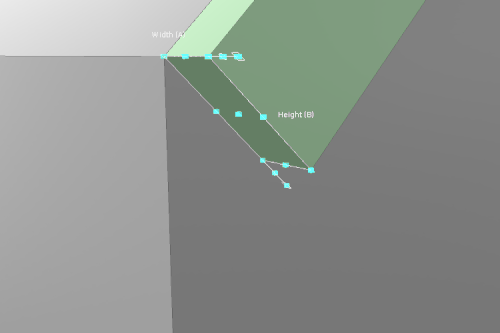
Gizmo Handles
The gizmo contains eight handles that form a bounding box around the profile with a ninth handle at its centre. Clicking on any of these handles will pin the selected handle to the first selected point in your 'path of points'.
Clicking on one of the four corner handles, of the bounding box, that surrounds the profile will also cause 4 additional handles to appear. These are used for rotating (handle with circle) and rotating plus scaling (handle with square) the profile to a target point in the same plane as the gizmo.
Selecting a rotate/scale handle will change its colour to green to indicate it's active and the swept geometry will no longer be drawn. At this point simply left-click on a polygon in the, same plane as the tool, close to the desired target point (do not click on the point itself) and the profile will rotate and/or scale to the target point.
Please note that the target point must be in the same plane a the gizmo (tool handles) and,
- If the closest point to when you clicked is invalid, then the tool bounding box with turn red for a short time; or
- if you click away from any geometry then the rotate/scale handle will remain green, allowing you another chance to click on a polygon close to your desired target point.
User Interface (UI)
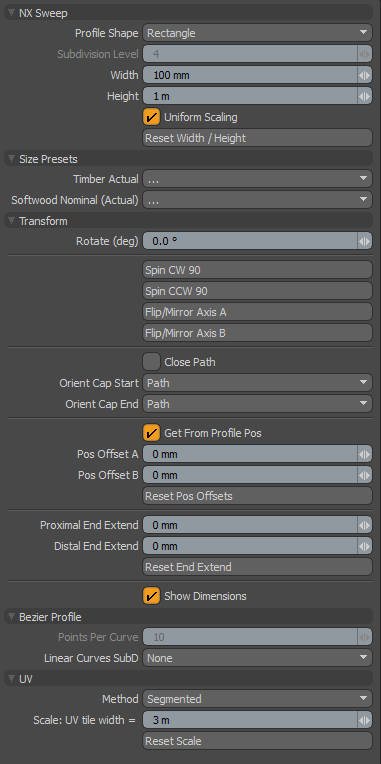
Profile Shape
Select the shape of the profile to use. This can either be one of the built-in shapes or a custom polygon (single n-gon polygon).
To use custom shapes place a single 'profile' polygon in a separate mesh item layer and select that layer along with the mesh item layer containing your path points, prior to activating the tool.
Subdivision Level
This allows you to interactively change the number of points (smoothing) in the built-in Cavetto, Ovolo, Half-Round, Quarter-Round and Round profiles. (Added: v1.2.0)
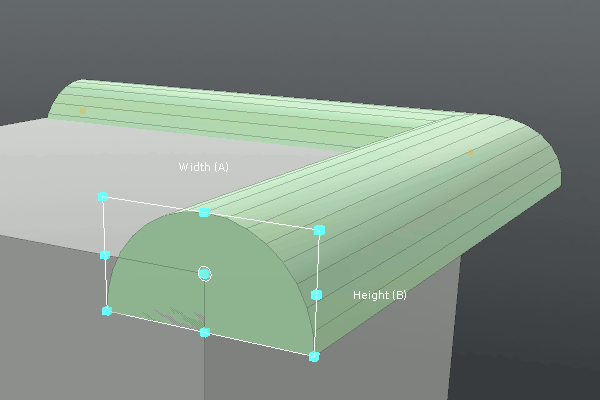
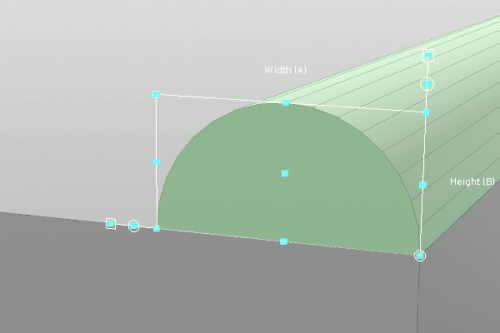
Width
Set the width of the profile.
Height
Set the height of the profile.
Uniform Scaling
Set the profile to scale uniformly. When this attribute is disabled you can set individual values for Width and Height.
Enabling this after is has been disabled will have no effect until the Width or Height is changed at which point the original width-to-height ratio of the profile will be applied to scale the profile.
Reset Width / Height
Resets the width and height to their original values. For built-in presets this will reset the profiles to their predetermined sizes, whereas, for custom profile this will set the height and width to match that of the original profile.
Size Presets Section
Timber Actual
A drop-down containing a wide range of commonly used timber size presets, with actual size given in mm (width x height). Use these presets to quickly set the size of the selected profile.
Softwood Nominal (Actual)
A drop-down containing a wide range of commonly used timber size presets shown with their nominal size in inches, along with their actual real-world size in brackets (in mm).
Why? A 2x4 piece of softwood is not actually 2 inches x 4 inches (its nominal size) in the real world, but rather about 1.5 inches by 3.5 inches, or 38mm x 89mm.
Transform Section
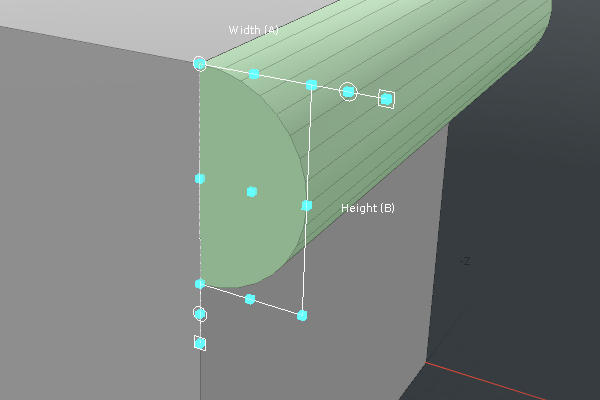
Rotate
Manually rotate the profile around the pinned gizmo handle. Switching the pinned handle will reset rotation.
Spin CW 90 and Spin CCW 90
Spins the profile clockwise(CW) or counter-clockwise (CCW), in 90 degrees increments, without altering the alignment of the gizmo (tool handles). Use this to quickly align the profile to the correct facing.
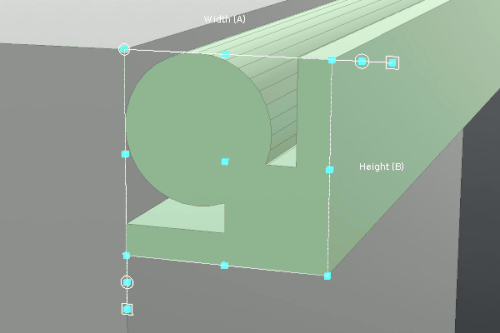
Flip / Mirror Axis A
Flips the profile shape along its A axis; i.e. along the width dimension direction. The axes are indicated in brackets above or to the size of the gizmo's handles.
This option is only available for single 'polygon island' profiles.
Flip / Mirror Axis B
Flips the profile shape along its B axis; i.e. along the height dimension direction; The axes are indicated in brackets above or to the size of the gizmo's handles.
This option is only available for single 'polygon island' profiles.
Close Path
When enabled the path is closed between the last and first point, creating a closed-loop of geometry (end and start are joined). This option is only available when the path contains three or more selected points.
Transform > End Orientation
Orient Cap Start and Orient Cap End
Sets the orientation of the geometry at start or end of the path; It can be set to follow the path or aligned to the vertical (Y-up) or horizontal. This is very useful when sweeping along pitched roofs, for example, because you can control how the end is cut.
Transform > Position Offset
Get From Profile Pos
Controls the profile's initial position relative to the path,
- When enabled this option uses the profile's current position in the XY plane to determine its position relative to the path. The caculated position is loaded into the Pos Offset A/B values.
- When disabled the profile/s are auto-centered to the path.
You are free to switch between these states whilst the tool is active.
Position Offset A and B
Offset the position of the profile, from it's pinned position, by the given distance along its local A or B axis; Axes are indicated in brackets above or to the size of the tool handles.
Reset Pos Offsets
Sets the value of both position offsets,
- When 'Get From Profile Pos' is off, both values are set to zero
- When 'Get From Profile Pos' is on, sets the values back to their initial offset position.
Transform > Extend Path Ends
Proximal End Extend
Extends the sweep at the near end of the path (from first selected point) by this distance, for open-loop paths. This value persists between tool activations. Use this,
- to overlap the proximal end with some existing geometry;
- to move the end beyond the position of the first available path point.
Distal End Extend
Extends the swept at the far end of the path (from last point) by this distance, for open-loop paths. This value persists between tool activations.
- to overlap the distal end with some existing geometry;
- to move the end beyond the position of the last available path point.
Reset Extend End
Sets the proximal and distal extension values back to zero.
Transform > Dimension Drawing
Show Dimensions
When enabled, the width and height dimensions (mm/m) are displayed to the side of the tool handles.
Bezier Profile Section
Points Per Curve
Sets the number of points per curve in the bezier path; i.e. controls the level of subdivision.
Linear Curves SubD
Choose whether or not to sub-divide linear curves within a bezier path profile,
- Standard: Sub-divide linear curves within the profile.
- None: Leave linear curves (straight sections) un-divided, which can reduce polygon count considerably.
UV Section
Method
Choose between,
- Segments: Creates individual UV islands for each segment of geometry along the path. Use for paths with hard turns where you want mitre-type joints between each section of geoemtry.
- Peel: Creates UVs that follow along the path in a single continuous section; i.e. Produces a result similar to modo's built-in UV peeler. Use for curved paths.
Scale: UV tile width
Exposes the sweep tool’s UV scaling parameter. Changing this value enable you to match the UVs to the stated coverage of an image/megascan; e.g. if you have a wood scan that is stated to cover 5m you can set this value and it will cover the equivalent distance over the swept geometry in the 3d view.
Reset Scale
Resets UV scaling to the same value used by the other Arch-E tools. All tools already share the same UV scale factor to spare you from having to scale one set of UV islands against another.